If you didn’t know this already, I love playing with paper and art supplies. That obsession started at a very early age.
As a child I learned how to make little booklets in which I saved magazine and newspaper cuttings containing short stories, comic strips and trivia. I drew and painted in them too. Making those little art booklets was one of my favourite hobbies as a child. They were a reflection of how I saw the world around me.
I will show you how to make very simple booklets with two kinds of bindings, and a few bookmarks with very easy watercolour techniques. Kids can make these easily, with a little help.
You already have most of the things that you need for these projects at home. You can also use up some of your fabric scraps.
Making a Signature
Books are made of signatures. These books are going to be made of one signature. We are going to make the signature first, then bind it.

You will need one piece of card stock for the cover.
Other than that you can use any paper. Printer paper will be more than fine. If you wish to paint in your booklet however, you will want thicker stock than printer paper.
Just one thing to remember: The thicker your paper, less the number of papers you are going to be able to fit into a signature. I made a multi-purpose book where I want to draw, paint and write. So I used 1 sheet of watercolour paper, 1 sheet of card stock and 5 sheets of sketchbook paper. Watercolour and sketchbook papers are larger than card stock paper. So I trimmed them all to 8.5″ x 11″ to match the card stock.
Fold each paper in the middle. Run the side of a ruler along the fold for a crisp fold.
Insert the folded sheets into each other.
Place one sheet of folded card stock as the outermost sheet to create the cover.
Depending on the size of your signature, you may need to trim the side.
Now that we have a signature made, we are ready to bind.
Ribbon Binding
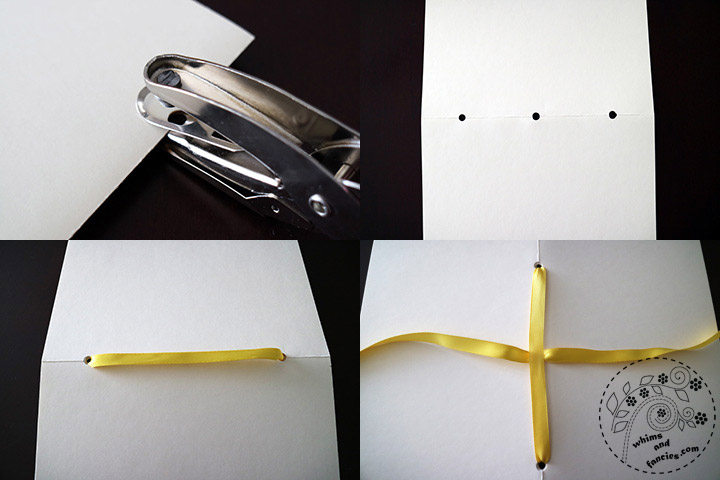
Fold a new sheet of card stock to make a template first. On the folded side, Measure 1.5″ from the top and bottom. Mark those two points and the centre with a pencil. Using a hole puncher, punch a semicircular hole on those marks. If you insert the hole puncher too far past the fold and punch a circular hole, you will end up with two separate holes when you unfold the sheet.
When you open up the page, you should see three circular holes along the fold. It’s fine if they are not perfect. They will be folded anyway.
Now place the folded template on top of the folded sheets of the signature so that the folded edges are all facing the same way. Using the template as a guide, punch holes in the sheets. Remember to make the holes semicircular. Depending on the thickness and number of sheets, you may have to do this in a couple of stages.
Tip – Use a paper clip to keep the papers and the template together.
Once the sheets are all punched, and you are happy with the arrangement of the signature, cut a yard of 3/8″ wide ribbon. Feed the ribbon through the two outer holes toward the inside.
Then grasp the two endings together from the inside and feed them through the middle hole toward the outside. After that, place one ribbon end on each side of the centre hole. If you have any twists in the ribbon, fix those at this time as well.
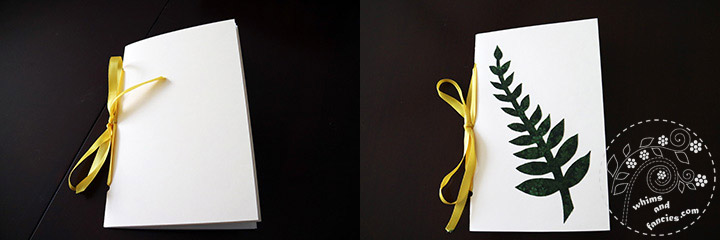
Tie a pretty knot. Trim if necessary. You may also want to trim the tips of the ribbon to a V shape to avoid fraying.
That’s it! The first book is made and ready to be used.
Your kids can start with decorating the cover now. Doodle, draw, paint, add stickers. Anything goes!
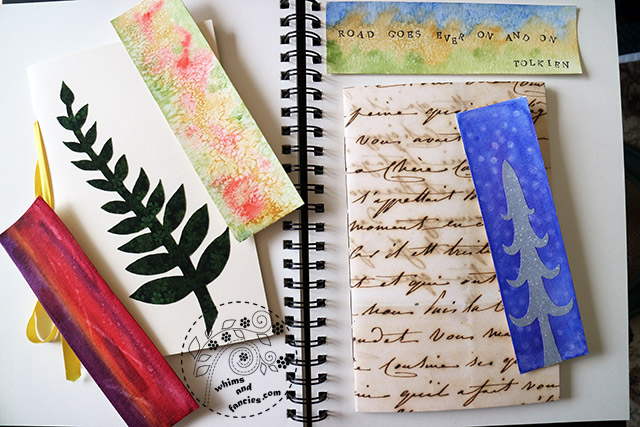
You can take out some of your fabric scraps too and press Heat-N-Bond on the back. Let your kid draw his/her own designs on the backing. Cut them out, arrange them on the cover. Place another piece of card-stock on top and iron on the cut-outs using a low setting.
That’s how I added the leaves on my book above. I might go back and add something else to it later on. Great way to use up those scraps of fabric, don’t you think?!
Stitched Binding
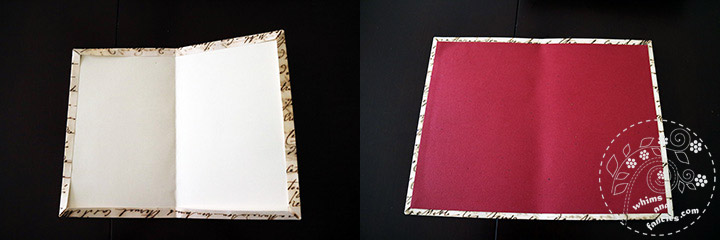
Cut a 9.5″ x 12″ piece of decorative paper. Use an 8.5″ x 11″ piece of card stock as cover paper. Apply generous amount of glue all over one side of the cover paper. Place it in the middle of the decorative paper, positioning it so that there is approximately 0.5″ of decorative paper overhang on all sides. Press it down. Then add glue to the overhang on the decorative paper and fold it over the cover page.
Now cut another 8″ x 10.5″ piece of decorative paper and apply glue to its reverse side. Place that paper in the middle of the cover page, making sure there is a 0.25″ gap to the edge on each side. Press it down.
Tip – A good quality glue stick works really well for me. No mess this way.
Fold the cover page back again along the centre.
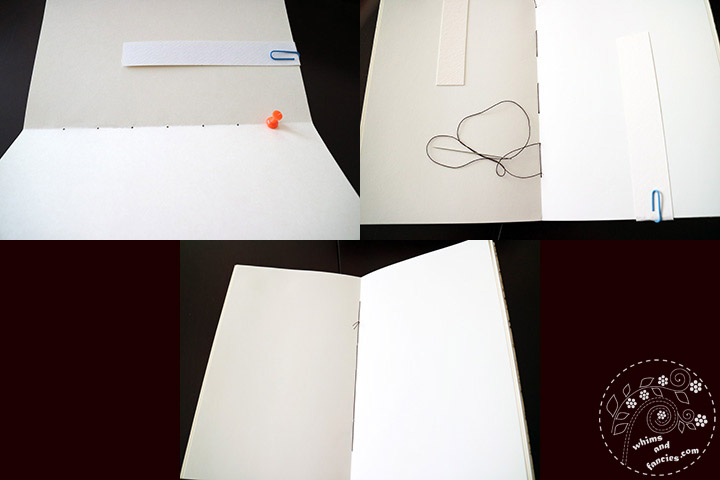
Use another piece of card stock to make a template for the sewing holes. Mark 1.25″ from the top, then continue to mark 1.0″ after that until you reach the bottom 1.25″. Push a push-pin through each of those marks and you have the template.
Now unfold the papers of your signature and place them underneath the template piece. You may want to hold them together with paper clips. Then push the pin through each of the holes in your template. You may have to do this in couple of stages, depending on the thickness of the stock you have chosen.
Once you have made holes in all of your sheets, put the signature together again. Now it’s ready for sewing.
Take a piece of thread that is a little longer than twice the length of your book. A little thicker thread like DMC Pearl Cotton works best. Using this thread and a needle, sew through every other hole starting at the top hole, on the inside. Make sure to leave a few inches of thread behind as a tail.
Once you have reached the bottom, come back up again, sewing through every other hole. You should now have filled the gaps you left when you sewed your first pass. Once you reach the second hole from the top, tie a knot with the tail-end of the thread from the first hole.
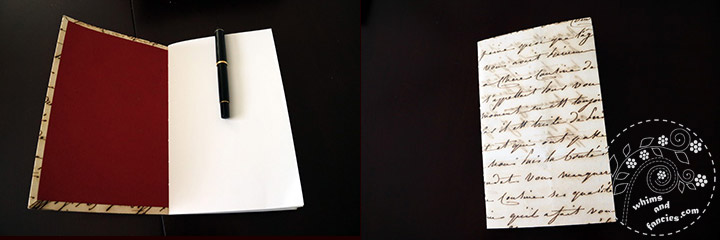
This is how the book looks, on the inside and outside. Decorate the cover more or start using it as-is.

They took hardly any time to make. You and the kids can make a bunch of them together. Fill them up with artwork or give blank books as Christmas presents.
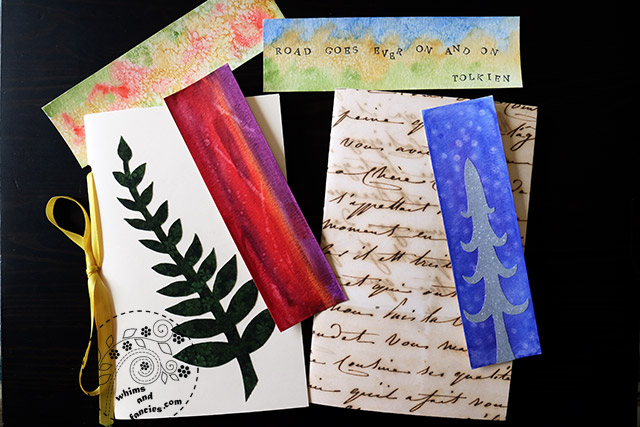
Watercolour Bookmarks
Now I will show you how to make a few bookmarks using simple watercolour techniques.
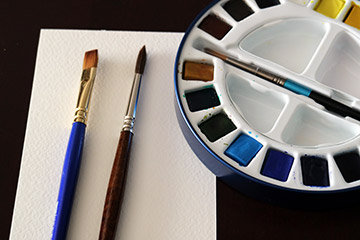
All you need for the bookmarks are strips of watercolour paper, paint, a flat brush and a round brush. Don’t worry if you can’t find a cheap flat brush, a bigger round brush will work well enough.
I used 7″ x 2″ strips of watercolour paper for my bookmarks. I used leftover scraps from bookmaking.
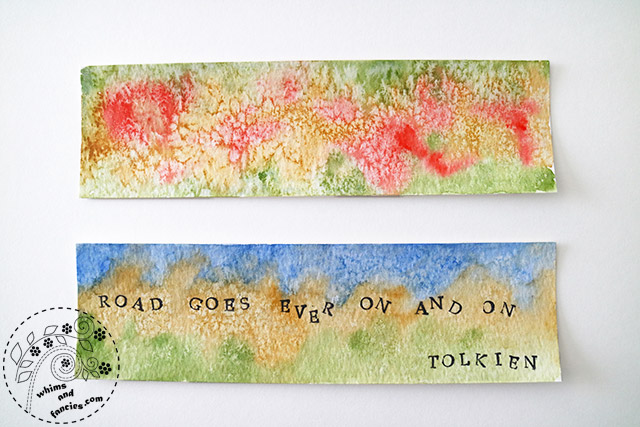
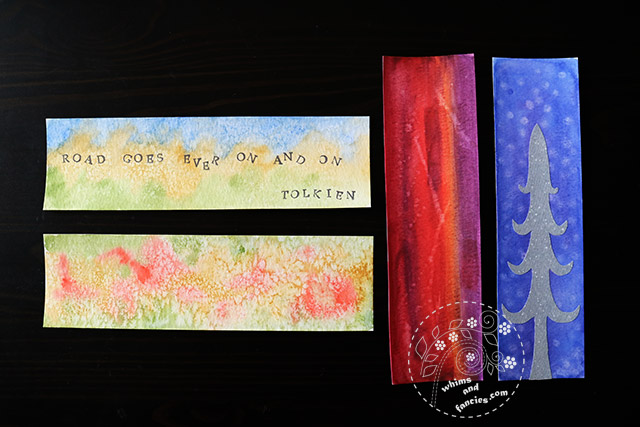
Using the flat brush, apply water all over the paper. Then dab paint on the wet paper, letting the difference paints flow into each other.
Then sprinkle salt on the wet paint. The salt starts absorbing the paint and creates a fun texture. I used a little too much on the top one and you can see how it lifted a lot more paint than I intended. I left it as-is to show you the difference. I will use it as background and paint on top of it later on.
Let the salt dry completely; this takes a while. Once completely dry, brush the salt off and you’re done! Use the bookmark as-is, draw on it with markers, stamp a favourite quote, anything you want.

For these two, I used the flat brush again to apply water all over the paper. I went back and forth on them with paint and let the different paints blend into each other.
For the left one, I dipped my brush in clean water. On the wet paint, I drew a couple of lines with the brush and then splattered a few drops of water by tapping on the brush. Let this dry and you will see the effect water has on paint. I will go back and paint on it.
For the right one, I used a cotton swab to lift off paint to create those fuzzy white dots. I cut a tree out of a scrap of silver fabric and ironed it on to the bookmark using Heat-N-Bond, just like the way I ironed on the leaves on the first book.
I love making bookmarks. They are fast, fun and easy to make. You can make a whole bunch all together. Sometimes I even make bookmarks to match the book I am reading.
I hope this inspired you and your kids to make a few of these as gifts. Personalize them for the recipient. Make a few for yourselves. Fill the books with wonderful art. Spend time together playing in the book and then swap them with each other at Christmas!
Happy Crafting,
-Soma
Leave a comment